Showing posts with label Meat. Show all posts

Saturday, February 21, 2015

Italian Stuffed Chicken Breasts with Marsala Mushroom Gravy - East to make - Low Carb

Italian Stuffed Chicken Breasts with Marsala Mushroom Gravy

 Spice up those Chicken Breasts and Impress your friends and family!

Italian Stuffed Chicken Breast
To be quite honest, my family prefers the dark meat. I'll cook a whole chicken and the breast meat is the last to be eaten. So the last time I had a whole chicken I got some inspiration and came up with this recipe and I impressed myself and my wife. I filleted the breasts, set them aside and cooked the dark meat for another dish.

4 Chicken Breasts boneless and skinless
Cream Cheese
Italian Salami and/or Pepperoni
Italian spice mix
1 Cup sliced mushrooms
Italian Stuffed Chicken Breast - seasoned and ready to roll!
1 cup roughly minced onions
1/2 Cup Marsala Wine
1/2 Cup heavy cream
Bamboo skewers
Olive Oil

Start by flattening and tenderizing the Chicken Breasts. Placing the breast between 2 sheets of plastic wrap will keep the  meat juices from spattering. If you fold the plastic wrap over, be sure to leave enough space on all sides of the chicken breast to allow for the flattening and expansion. A smooth surfaced meat tenderizer
Italian Stuffed Chicken Breast - cut the skewers
works best. If you have one of those little hammers that's rough surfaced on both sides, you can turn it sideways to a smooth surface. You can separate the chicken tender from the breast and place it beside the thinnest part of the breast. Pound the chicken breast out to roughly twice the size, roughly 1/4" thick. Remove the plastic wrap and season the top of the pounded chicken breast well with the Italian spice mix. Examine the breast and determine the best way it should be rolled. Place slices of salami and/or pepperoni on the edge of the breast where you're going to start rolling from. If you placed the chicken
Italian Stuffed Chicken Breast - browned in the skillet
tender beside the breast when you were pounding it out - start from that end. Cut the cream cheese into strips about 1/4 wide and lay one layer of strips at the base of the row of salami. Now roll the chicken breast from where you placed the sliced salami, toward the opposite end. It can be a little tricky to start, especially with the chicken tender. You'll get the hang of it. Now that you have it rolled. Take your bamboo skewer and place it at the end of the roll and skewer from that end almost all the way through, leaving about 1" of skewer end poking through. Use kitchen sheers or you can simply break the
Italian Stuffed Chicken Breast -Marsala, Mushroom, Cream and Onion
skewer off on the long end leaving approximately 1" sticking out of the other side. Use the remainder of the sharpened skewer to do the same thing to the breast about 1" to 2" from the original. Keep the skewers horizontal instead of random.  You should be able to get 2 to 3 good skews per skewer. Do this for all 4 breasts.

Place some olive oil in a large skillet, over medium heat, once the oil is hot, place the stuffed chicken breasts in the skillet, and brown them, 4 to 6 minutes on each side. When the breasts are cooked all the way through, place them aside on a serving platter. Remove the skewer pieces, by gently spinning the skewer first to break it loose then pull them out.

Add olive oil to the skillet if it needs it, turn the heat up to a medium high, let the oil get good and hot and add the mushrooms and onions, stirring occasionally. When the mushrooms and onions start to brown and become translucent add the Marsala wine and cook until the wine reduces by half. Once the wine has reduced, add the heavy cream and heat through. When done pour over the top of the stuffed chicken breasts. If the breasts have cooled too much, you could pop them in the microwave for a minute before topping with the Marsala mushroom mixture.
Enjoy!


Thursday, December 11, 2014

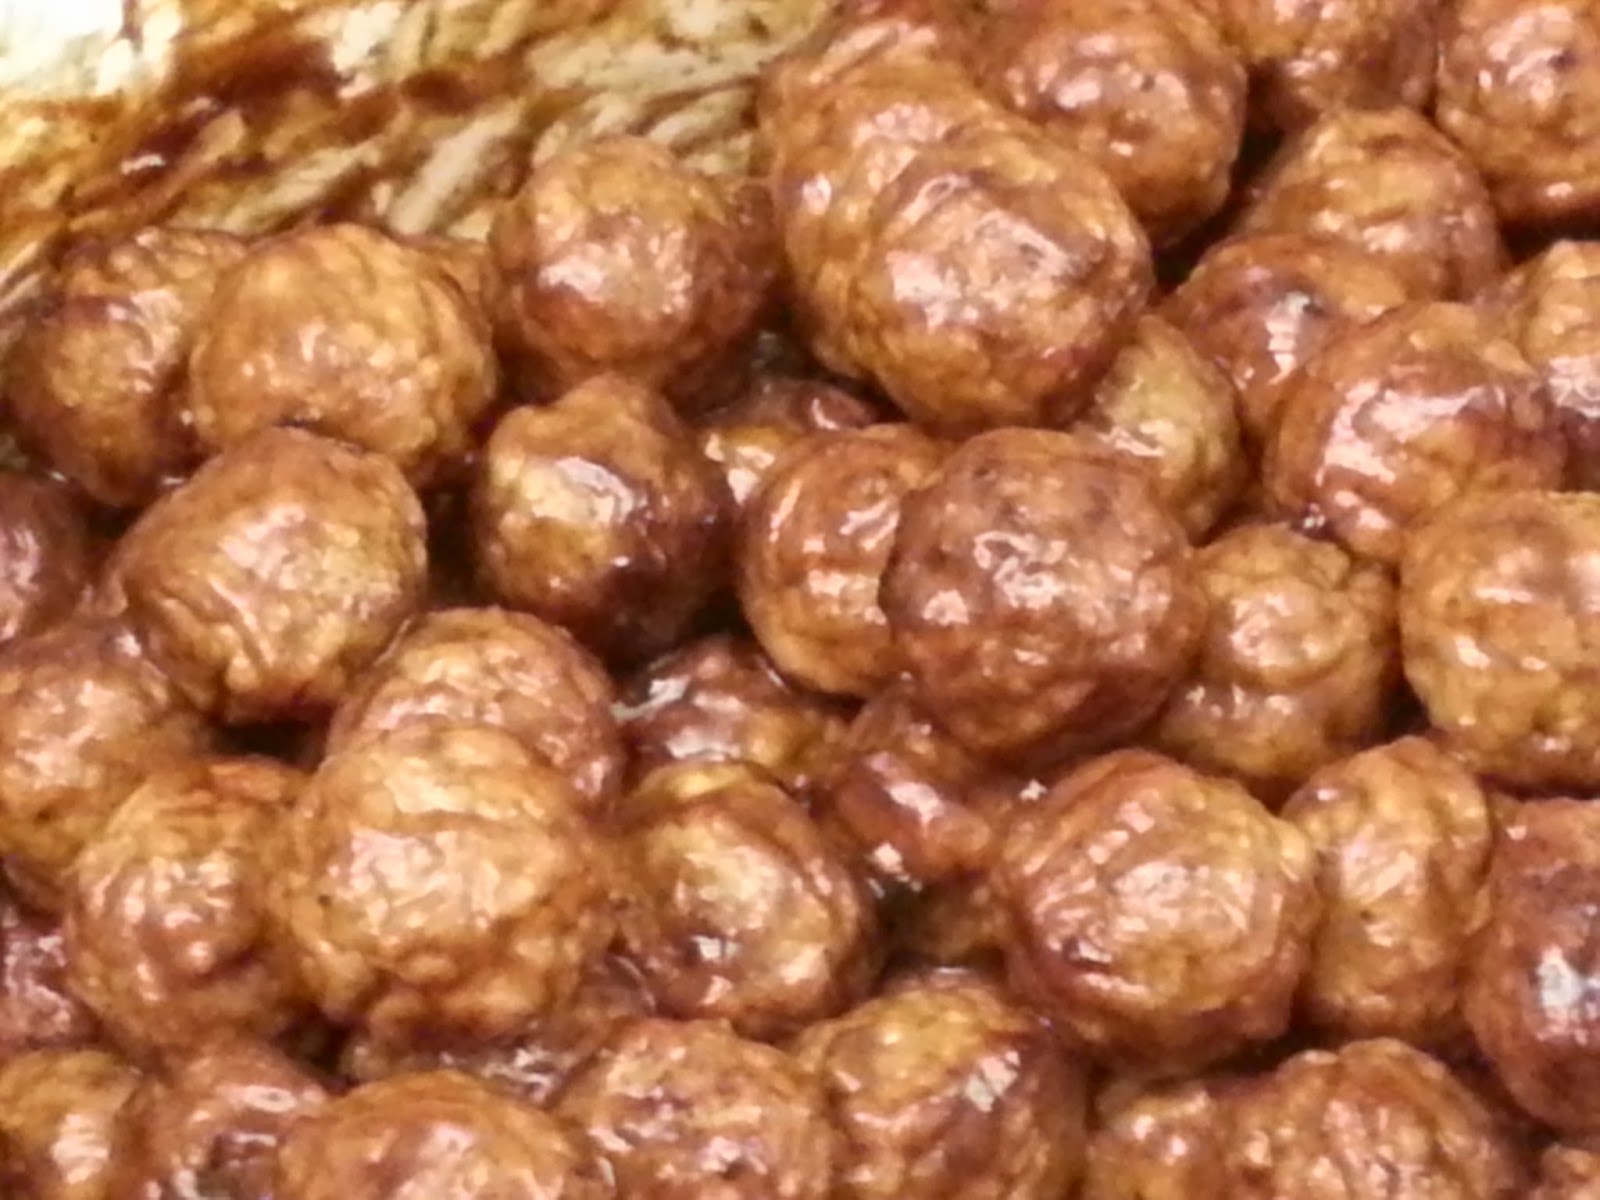
Potluck Crockpot BBQ Meatballs

Potluck Crockpot BBQ Meatballs

This isn't a recipe per se, it's a survival tip!

This is my go to dish for the potluck at work.

Tis the season! It's the season of shopping, family, parties and lots of extra activities. It's also the
season of potlucks! Now if you're running short on time, here's a slam dunk way to participate in a potluck without spending too much time preparing a dish.
  I've got a 6qt oval crockpot, pretty much any one will do. Buy some pre-cooked frozen meatballs - for the latest one I grabbed two 2# bags of frozen meatballs. Each bag had approximately 64 1/2 oz bite size meatballs, flame broiled - I believe that adds some flavor and an 18 oz bottle of BBQ sauce. The beauty of this is that I can grab my crockpot, the bag(s) of frozen meatballs, and BBQ sauce all fit inside the crockpot along with a serving spoon. Don't forget the serving spoon!


 When I get to work, I layer the meatballs and BBQ sauce in the crockpot. I'll put an ounce or so of hot water in the BBQ sauce bottle and rinse it out into the crockpot, giving me some extra moisture for thawing and cooking. I turn the crockpot on low. I stir them every 45 to 60 min - when lunch time rolls around, the meatballs are heated through and are ready to go! And the nice part is that they usually get completely eaten and I don't have to deal with transporting leftovers! 


Monday, September 30, 2013

Mexican Pork Riblets

Mexican Pork Riblets


This is my all time favorite Pork dish. Tender fall of the bone pork, slow cooked in a flavorful Mexican sauce. This dish can be made with any cut of pork. I think it's best with riblets.
This can be served as a main dish or as an appetizer. If you choose to make it with boneless Pork, then this makes a wonderful taco or burrito filling.
There's a great deal of talk about peasant food - cheap, common food often raised to gourmet level. 'Riblets' are pork rib timings. When a rack of pork ribs are trimmed, especially when trimmed for Santa Fe style there's not much else that can be done with those trimmings, it's too much trouble to separate the meat from the bone, often the riblets are thrown away. Some places will sell them. Many people, myself included, think the flavor of the meat closest to the bone is better.

The Recipe is simple and the results are outstanding.
3 to 5 pounds or so pork cut into 1" cubes, riblets should be cut into pieces - cut between the bone
3 - 7.75 oz. Cans of El Pato Mexican Tomato Sauce
1 or 2 Tbsp ground Cumin spice
1 Medium to Large Onion sliced

Place the pork, onion, sauce and cumin in a Crock Pot, stir so that everything is coated in sauce. Cover and put on low for a minimum of 5 hours. When the meat can easily be pulled apart or pulled off the bone, they're done. You can turn the heat down to warm until it's time to eat.

I commonly will prepare everything in the removable crock, and put it in the refrigerator over night. In the morning, just before leaving for work, I'll put the crock in the holder and set it on low. Nine or so hours later, when I arrive home, the house smells delicious! It only takes a few minutes to prepare a side dish, and sit down to a delicious dinner.

If you're in a hurry - you can put everything into a large pot, add some broth (Chicken or Vegetable) or even water to thin out the sauce, turn the stove to medium high and stir ever 5 to 7 minutes until tender.

For Taste Sake
This can be served with the traditional refried beans and rice.
Another good alternative I enjoy them with is whole wheat angel hair pasta. This is one of the few dishes that is hearty enough to not get overpowered by the whole wheat pasta. Regular pasta is also a good side dish.

For children and those faint of heart you can control the heat by using only tomato sauce, or 2 cans tomato sauce to one El Pato, or 1 can tomato sauce to 2 El Pato. You can further increase the heat by adding chipotle peppers either finely minced or blended in.

You can also experiment with the amount of cumin you add to the dish, for those who really like the flavors of Mexican cuisine - you can easily add another tablespoon or two.

Just a note to be aware of the bones in this dish, when cooking for long periods of time the bones can begin to disintegrate, so chew carefully.


Tuesday, May 1, 2012

Chili Verde Recipe

Chili Verde is one of my all time favorite Mexican dishes!
DELICIOUS tender chunks of pork simmered in a wonderful green sauce.
I've order this dish in more restaurants than I can remember an I've enjoyed them all - Here's how you can enjoy it and serve it for others to enjoy.

This is a very simple dish, your results depend on your dedication to maximizing the flavor.

Pork cut into small cubes any amount will work - calculate 1/3 lb to 1/2 lb fresh pork per person.
1 Onion Per 2 lbs of Pork sliced as you desire (minced or sliced is typical)
Ground Cumin about 1Tbsp per pound add as much as you wish
Green Enchilada Sauce or Roasted Tomatillo Salsa (15oz can per 2lbs of pork)

Start with an inexpensive cut of pork - the better the cut - typically the more tender and leaner the meat. An inexpensive cut can be improved by trimming away as much fat and gristle as possible. Tenderness can be achieved by cooking the meat longer. It's pretty hard to 'Over Cook' pork - the longer you cook it the more tender it becomes.

The simplest method is the 'Unattended Crockpot' - let the crockpot do all the work - Mix Pork, onion, cumin and Enchilada sauce together - put the crock on high or low and come back in a few hours - this is a great way to put a meal in the crockpot in the morning and come home from work with the house smelling WONDERFUL and a ready-to-eat meal waiting for you when you walk in the door!

The 2nd More Flavorful method is the "Attended Crockpot' - The pork, and onion have quite a bit of moisture in them - which is great if you're leaving the crockpot unattended but that moisture does dilute the Enchilada sauce. So to increase the flavor, we need to let the moisture evaporate throughout the cooking process - this evaporation, concentrates the flavor of the dish. So if you're going to be home enough to supervise the crockpot - You can let it cook enough with the top on to thoroughly cook the pork. Then take the lid off and let it cook uncovered for several hours, stirring the dish and scraping down the sides of the crockpot so that the sauce doesn't burn on the side of the crockpot.

The 3rd and most flavorful method is to precook the onion and pork - this requires more work but the flavor is worth it! Start with a small amount of oil, Chicken or Beef  broth, or water in a skillet add the cubed pork and onion, eventually the moisture will start coming out of the pork and onion - you'll have almost a soup - just keep the heat on it until the moisture evaporates. You'll be tempted to pour the liquid off (which you can do) - but there's flavor in that liquid! Keep cooking untill the bottom of the pan is DRY. Once it's dry - add the Pork, Onion, Cumin mixture to the Enchilada Sauce in the crockpot and cook it in the crockpot until tender.

This dish is typically served, scooped on a plate with Spanish rice, Refried beans, and tortillas on the side, but it makes a wonderful taco and burrito filling.

There's various Green Enchilada Sauce and Roasted Tomatillo Salsas on the market "Las Palmas Green Chile Enchilada Sauce" is probably the most common but experiment with different brands.


Saturday, March 19, 2011

Homemade Corned Beef Hash

Homemade Corned Beef Hash
If you like Corned Beef Hash from a can, or what they serve in a restaurant (which is probably from a can) then You'll LOVE fresh homemade Corned Beef Hash.


Ingredients
Leftover Corned Beef cubed
Potatoes the amount depends on your preference I like a 50/50 mix or even a 60/40 of Corned beef to potato ratio.
Green onion about 1/4 cup sliced (including the green portion)


The potatoes can make or break the dish
Potatoes being browned for Homemade Corned Beef Hash
The potatoes must be thoroughly cooked, very few people enjoy a raw potato. The first key to cooking the potatoes is cutting them into uniform size, this ensures they will cook through at the same time. It's all a matter of preference how thick you cut the potatoes - that's how you make this recipe yours - just do it uniformly. Make your first cut a 'stabilizer' cut. Slice a small piece off of the long side of the potato, then place the exposed portion of the potato down on the gutting board, this will keep the potato from rocking around as you slice it. Next cut the potatoes in 1/2" or what ever width you prefer, slices. Now stack 2 or three slices on top of each other and cut the rounds into strips (french fries) the same width as the first slices (ie. 1/2"). Next turn those strips crosswise on the cutting board and cut the strips into cubes - again paying attention the the width (1/2"). There's bound to be 'ends' that are not uniform - if their size is significantly smaller than the rest of the cubes (ie. 60% or smaller), either discard them or set them aside to be added later. The small ends will cook that much faster than the others and by time the large pieces are done - the small pieces are burnt. The only thing worse than raw potatoes, are burnt potatoes.

In a large skillet, put enough vegetable oil to cover the bottom with a bit of extra - enough to give you a puddle. Set the heat to medium high and wait till it comes up to temperature - you should be able to put your hand over the oil and feel the heat coming off of it. I wet a finger from the sink faucet and flick a small amount of water into the oil - it'll snap and dance. Use caution when doing that. Now dump all your cubed potatoes into the hot oil. It's best if you try to spread them as evenly as possible. This is a trick part - the starch in the potatoes tend to stick, use a good spatula and stir/turn over the potatoes using a scraping motion to the bottom of the pan. Give the potatoes a bit of rest in between each stir/turn over. When the potatoes start getting crispy - taste test them to be sure they are cooked all the way through.

Homemade Corned Beef Hash with two eggs over easy
Add your corned beef to the skillet, and stir into the potatoes. The potatoes shouldn't be as sticky now and the corned beef should mix in easily. Once the corned beef starts to get crispy, add the green onion and finish cooking the hash to your preference of crispness. I like to serve Corned Beef Hash with eggs over easy. Either beside the hash or right on top of the hash.

Salmon Hash
For Taste Sake
Hash can be made from just about anything - my second choice is canned corned beef, roast beef, pork, ham. I've even made Salmon Hash that was wonderful. If you don't have any leftover pre-cooked meat then cook what ever raw meat you have on hand, once it's cooked, then proceed with the recipe.

Some tips to reduce the sticking of the potatoes: Room temperature potatoes will stick less. A cast Iron skillet is nice because the thickness of the cast iron holds it's heat better than other pans - adding the potatoes to hot oil lowers the cooking temperature of the oil which makes them stick.

If you're just coming off of St. Patrick's Day - and have left over potatoes - they are perfectly fine to use. Cube them up and add them to the hot oil, they're already cooked through, so you just cook them till they're visually done.

Wednesday, March 16, 2011

Corned Beef with Pan fried Cabbage, Carrots and Onion

Corned Beef is the Ultimate 'Crock Pot' meat. You can put the Corned Beef in the crock pot before leaving the house in the morning and return home after a long day at work and it will be ready to enjoy!

Corned Beef is a cured meat. The cure is typically a heavily salted brine commonly containing Potassium  nitrate which preserves the pink color. The cut of beef is often brisket or round steak, both considered tough cuts, the  brining process tenderizes and preserves the meat.


Traditionally the meat is boiled - a common method is to boil it in water for 50 minutes per pound. Boiling the meat tends to reduce the salt taste in the meat. Other variations involve boiling it in beer, apple juice, or pineapple juice. The 'juice' contained in the package is part of the flavoring and goes in the pot. There's also a small spice packet in the package - open it and sprinkle the spices over the meat. Some people boil the meat then finish it off on a BBQ, adding a smokey dimension to the meat.

The Vegetables
Cabbage, potatoes, and carrots are another part of the traditional meal. Often they are cooked in the same pot as the meat. Since the cook time is rather long for these vegetables they are left in large chunks. Potatoes and carrots can be left whole, carrots should be pealed and have the tops cut off, potatoes may have the skin on or off. Cabbage it commonly cut into four large chunks.

Crock Pot Method
I prefer to put the meat, juice and spices in a crock pot, with enough apple juice to halfway cover the meat. Set the crock pot on low and cover. The apple juice adds a bit of sweetness as well as take out some of the saltiness. It's pretty hard to over cook a corned beef. I recently had a 4 pound corned beef in the crock pot from 7:00am till 6:00pm - that's 11 hours and it was wonderful!

Boiled Red Potatoes
I prefer my vegetables cooked separately. I prefer the small red potatoes boiled in heavily salted water. Once they are fork tender throughout. I drain them in a colander, placing the hot pot back on the stove and using the residual heat to melt some butter and sprinkling in some chopped fresh rosemary and chopped Italian flat-leaf parsley. The larger potatoes I'll cut in half or quarters, smaller ones I leave whole. Once the butter is melted and the herbs have had a chance to get heated, add the potatoes to the pot and stir.


Pan Fried Cabbage and Carrots
I prefer the cabbage, carrots stir fried with some onion. Peal the leaves off the cabbage head and stack them on a cutting board. Using a large chef's knife, thinly shred the cabbage. Thinly slice the carrots, using a knife, vegetable peeler or small mandolin (theTitan Peeler works great!)
. Mince about half a cup of onion. In a large skillet over medium high heat, coat the bottom of the pan with a half cooking oil and half butter mixture, add a pinch of caraway seed, celery seed, and some fresh ground black pepper. Put he onions in first when they are translucent, add the carrots - if the carrots are on the thick side, let them cook a bit before adding the cabbage, otherwise add the shredded cabbage at the same time. Stir fry to the desired doneness. Some people like their vegetables heated through but still crunchy, some like them with a bit of scorch on them. Set the vegetables aside, while you carve the meat.

Carving the meat
Gently lift the meat out of the pot, using a sturdy spatula or straining spoon, and place on the cutting board. Using the spatula or spoon, gently scrape and peel off the layer of fat and discard. Once the fat layer is removed it's easy to see the 'grain' of the meat. Any and all meat should be carved across or against the grain this will yield short fibers and a tender slice. OK the the meat has been tenderized by brining and has now had the daylights boiled out of it so it's tender but do you really want to serve a chunk of stringy meat? So get out your carving fork and your longest, sharpest knife. Position the cutting board and the meat so that you can comfortably draw the knife across the grain of the meat. The REAL trick here is to put the fork at the side of (not in) the meat closest to you, placing the tine of the fork the width of one slice of meat inward from the edge. Place the knife as far as comfortably forward as possible, then draw the knife back towards you, using the tine of the fork as a guide, bull the knife directly against the tine of the fork. ALWAYS draw the knife towards you and against the fork tine, using a sawing, back and forth cutting action will guarantee you an unrecognizable pile of meat strands.

For Taste Sake
Over all corned beef with the fat layer removed is a rather low calorie source of protein. More calories can be saved by substituting broth in the skillet, instead of the half and half oil and butter mixture, steaming the vegetables instead of frying.

I think one of the greatest joys of eating corned beef is that it goes so well with mustard so we break out the mustard collection - coarse ground, Dijon, Wasabi , Hot Chinese.

The cabbage, carrots, and onions can be cut up the night before, stored in the refrigerator in plastic bags to make the preparation that much easier, the following day.

I love a good corned beef dinner but truth be told, I would cook corned beef simply for the leftovers - a Ruben Sandwich is one of my favorites but you haven't lived till you've had freshly made corned beef hash!
 I promise to make that my next recipe.


Wednesday, February 16, 2011

Fred's Famous BAM Chicken

BAM Chicken Thigh
This is one of my signature dishes, and a family favorite. It's delicious, with crispy skin, moist tender meat and it's very easy to make. We never tire of this treat.

First start with the BAM mix:
1 Part Paprika
1 Part Garlic Powder
1 Part Salt
1 Part Brown Sugar
For example 1/4 cup of each ingredient will give you 1 Cup of BAM mix.
Mix thoroughly, and store in a container - preferably one with a shaker top.

Next is the chicken - If you know how to debone a chicken - that's the first choice  (I'm putting the finishing touches on my video on how to debone a chicken and hope to post it soon). Second choice are thighs. You can use any parts you prefer or bake the chicken whole - I prefer those stand-up chicken rack for roasting the whole chicken.

Whole deboned BAM Chicken
Coat the chicken thoroughly with BAM mix. Line a cookie sheet that has sides, with aluminum foil. Place the coated chicken pieces, evenly spaced on the foil. Preheat the oven to 400 degrees and bake for 45 minutes.
The grease captured in the foil is perfect for making gravy.

For roasting the whole chicken - if you're using one of the stand up roasting racks (they allow all of the skin to get crispy) I remove one of the oven racks or put them all on the lowest part of the oven, making room for the stand-up chicken rack. I take a cast iron skillet and place the rack inside the skillet along with about 1/2 a cup of water - so that the grease doesn't burn if it overflows. Bake at 350, if we baked at 400, there's the possibility of burning the outside of the chicken before the inside is finished cooking. We lower the cooking temperature and increase the amount of time. The amount of time will be dependent on the size of the chicken, I would allow 1 1/2 to 2 hrs.  You should use a meat thermometer to check the temperature - stick the probe as deep as you can on the inside of the thigh, between the body and the thigh. The meat should reach a temperature of 165 degrees (check it in several places in that area - the LAST thing you want is under cooked chicken!)

For Taste Sake
For a different flavor variation - try making the spice mix with Smoked Paprika
I prefer using Kosher salt with big flakes instead of the standard, fine grained table salt.