Showing posts with label Easy To Cook. Show all posts

Saturday, February 21, 2015

Italian Stuffed Chicken Breasts with Marsala Mushroom Gravy - East to make - Low Carb

Italian Stuffed Chicken Breasts with Marsala Mushroom Gravy

 Spice up those Chicken Breasts and Impress your friends and family!

Italian Stuffed Chicken Breast
To be quite honest, my family prefers the dark meat. I'll cook a whole chicken and the breast meat is the last to be eaten. So the last time I had a whole chicken I got some inspiration and came up with this recipe and I impressed myself and my wife. I filleted the breasts, set them aside and cooked the dark meat for another dish.

4 Chicken Breasts boneless and skinless
Cream Cheese
Italian Salami and/or Pepperoni
Italian spice mix
1 Cup sliced mushrooms
Italian Stuffed Chicken Breast - seasoned and ready to roll!
1 cup roughly minced onions
1/2 Cup Marsala Wine
1/2 Cup heavy cream
Bamboo skewers
Olive Oil

Start by flattening and tenderizing the Chicken Breasts. Placing the breast between 2 sheets of plastic wrap will keep the  meat juices from spattering. If you fold the plastic wrap over, be sure to leave enough space on all sides of the chicken breast to allow for the flattening and expansion. A smooth surfaced meat tenderizer
Italian Stuffed Chicken Breast - cut the skewers
works best. If you have one of those little hammers that's rough surfaced on both sides, you can turn it sideways to a smooth surface. You can separate the chicken tender from the breast and place it beside the thinnest part of the breast. Pound the chicken breast out to roughly twice the size, roughly 1/4" thick. Remove the plastic wrap and season the top of the pounded chicken breast well with the Italian spice mix. Examine the breast and determine the best way it should be rolled. Place slices of salami and/or pepperoni on the edge of the breast where you're going to start rolling from. If you placed the chicken
Italian Stuffed Chicken Breast - browned in the skillet
tender beside the breast when you were pounding it out - start from that end. Cut the cream cheese into strips about 1/4 wide and lay one layer of strips at the base of the row of salami. Now roll the chicken breast from where you placed the sliced salami, toward the opposite end. It can be a little tricky to start, especially with the chicken tender. You'll get the hang of it. Now that you have it rolled. Take your bamboo skewer and place it at the end of the roll and skewer from that end almost all the way through, leaving about 1" of skewer end poking through. Use kitchen sheers or you can simply break the
Italian Stuffed Chicken Breast -Marsala, Mushroom, Cream and Onion
skewer off on the long end leaving approximately 1" sticking out of the other side. Use the remainder of the sharpened skewer to do the same thing to the breast about 1" to 2" from the original. Keep the skewers horizontal instead of random.  You should be able to get 2 to 3 good skews per skewer. Do this for all 4 breasts.

Place some olive oil in a large skillet, over medium heat, once the oil is hot, place the stuffed chicken breasts in the skillet, and brown them, 4 to 6 minutes on each side. When the breasts are cooked all the way through, place them aside on a serving platter. Remove the skewer pieces, by gently spinning the skewer first to break it loose then pull them out.

Add olive oil to the skillet if it needs it, turn the heat up to a medium high, let the oil get good and hot and add the mushrooms and onions, stirring occasionally. When the mushrooms and onions start to brown and become translucent add the Marsala wine and cook until the wine reduces by half. Once the wine has reduced, add the heavy cream and heat through. When done pour over the top of the stuffed chicken breasts. If the breasts have cooled too much, you could pop them in the microwave for a minute before topping with the Marsala mushroom mixture.
Enjoy!


Thursday, December 11, 2014

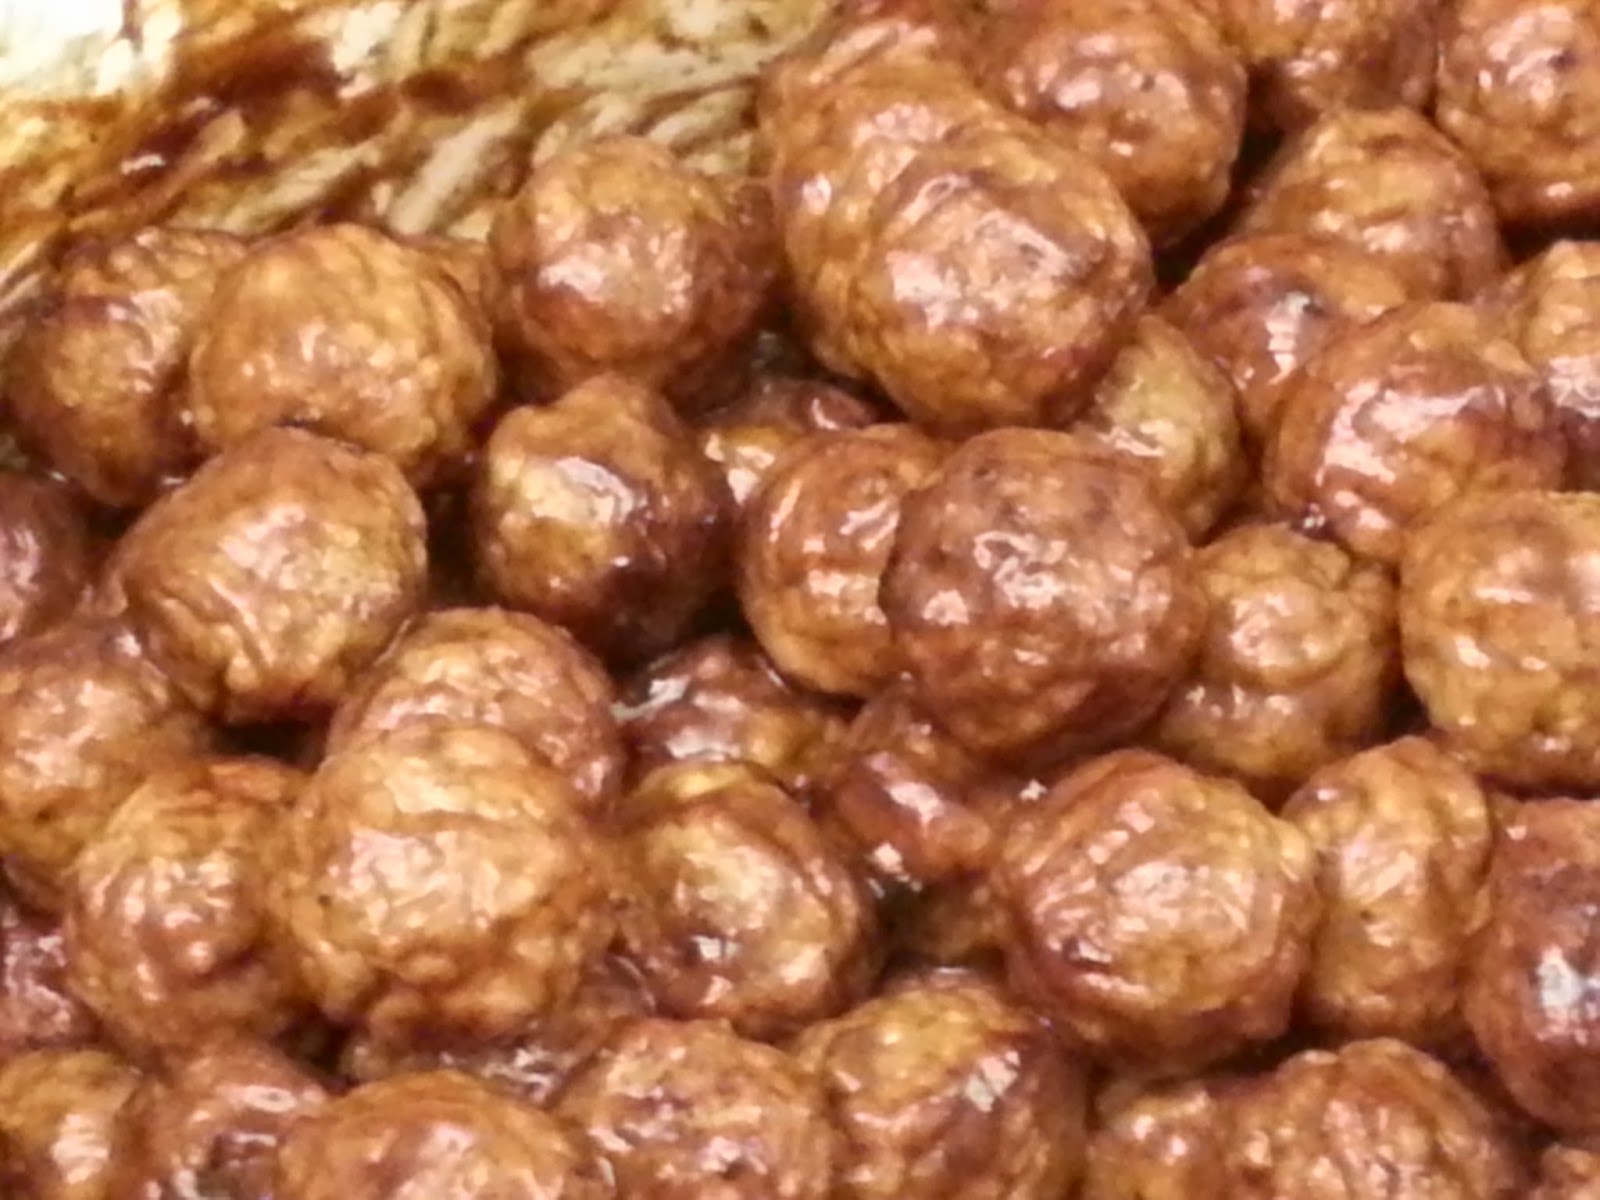
Potluck Crockpot BBQ Meatballs

Potluck Crockpot BBQ Meatballs

This isn't a recipe per se, it's a survival tip!

This is my go to dish for the potluck at work.

Tis the season! It's the season of shopping, family, parties and lots of extra activities. It's also the
season of potlucks! Now if you're running short on time, here's a slam dunk way to participate in a potluck without spending too much time preparing a dish.
  I've got a 6qt oval crockpot, pretty much any one will do. Buy some pre-cooked frozen meatballs - for the latest one I grabbed two 2# bags of frozen meatballs. Each bag had approximately 64 1/2 oz bite size meatballs, flame broiled - I believe that adds some flavor and an 18 oz bottle of BBQ sauce. The beauty of this is that I can grab my crockpot, the bag(s) of frozen meatballs, and BBQ sauce all fit inside the crockpot along with a serving spoon. Don't forget the serving spoon!


 When I get to work, I layer the meatballs and BBQ sauce in the crockpot. I'll put an ounce or so of hot water in the BBQ sauce bottle and rinse it out into the crockpot, giving me some extra moisture for thawing and cooking. I turn the crockpot on low. I stir them every 45 to 60 min - when lunch time rolls around, the meatballs are heated through and are ready to go! And the nice part is that they usually get completely eaten and I don't have to deal with transporting leftovers! 


Thursday, August 14, 2014

Easy Thai Curry Brussels Sprouts

Easy Thai Curry Brussels Sprouts

Are you looking for a way to create Thai food at home? Impress your friends, family, and visiting dignitaries - not to mention your taste buds, by preparing this simple yet tasty dis at home.

Easy Thai Curry Brussels Sprouts is simple and quick to prepare and the results are very
Easy Thai Curry Brussels Sprouts
impressive. Those that are familiar with Thai food will be impressed with your cooking skills and those that are not familiar with Thai food will find themselves liking it!

1 Can Coconut Milk
1 pound Brussels Sprouts (stem cut, cut in half length-wise, loose and discolored leaves discarded)
8 or so Mushrooms quartered
1/2 medium Onion sliced
Thai Curry Paste (Green, Yellow, or Red)

Into a deep skillet or pot, empty the can of coconut milk. Heat the coconut milk over a medium high heat. Dissolve teaspoons of Thai Curry Paste into the coconut milk until the curry mixture tastes slightly stronger than you typically prefer. I typically start with 2 to 3 teaspoons of Thai Curry Paste. Add the Brussels Sprouts, onion slices and mushrooms to the curry mixture. Bring the mixture to a slow boil, stir until the Brussels Sprouts reach the tenderness you prefer. Serve in a bowl.

For taste Sake
Typically Green Thai Curry is on the sweeter and milder side, Yellow Thai Curry is medium spicy and Red Thai Curry can be spicy hot. BUT since you are preparing this dish, you are in control. Extra Green paste can make the dish spicy, and holding back on the Red Curry Paste can give you milder results.    


Monday, July 7, 2014

BBQ Grilled Sweet Potatoes

BBQ Grilled Sweet Potatoes

Imagine a warm slice of sweet potato with appealing grill marks, a slight crust,
BBQ Grilled Sweet Potatoes
giving way to moist fluffy potato. The sweet taste of sweet potato with a slight tang of mustard on your tongue.

Impress your friends and family with this simple recipe that makes an excellent addition to any BBQ.

Take one or more Sweet Potatoes or Yams, pealed and then sliced 1/4" to 3/8" thick. Place the potato slices in a microwavable bowl, cover them with water then microwave them on high for approximately 10 min. Drain the water off and lay the slices out on a cutting board or any flat surface. I prepare a mixture of 1 part mustard and 1 part Cooking oil. If you don't like mustard you can use straight cooking oil. The mustard does add a bit of tang to the potatoes. Remember that mustard typically has vinegar in it and vinegar and oil don't mix well so you do need to use a wisk or fork and give the mixture a good whippin'! Brush one side of the potato, place it oiled side down on a preheated grill over a medium heat. Then brush the other side of the potato with your oil mixture.

The goal of microwaving the potato slices are to partially cook the potato - not completely cook it through. A thoroughly cooked potato is going to need some extra care on the grill - you'll probably need a spatula to turn them. Partially cooked potatoes should be able to be handled with tongs. The oil mix will keep the potatoes from sticking to the grill. With some practice, you can achieve perfect grill marks. The combination of heat and oil coating will give the potato slices a slight crust and they'll be soft and moist inside.
My local Farmer's Market carries Japanese Sweet Potatoes which can grow relatively large when
Japanese Sweet Potato
compared to most sweet potatoes and yams. Cutting a smaller sweet potato diagonally or length-wise will give you larger slices which are easier to handle. You can also use regular potatoes in this recipe, the waxier type (red, yellow Yukon etc.) work best.


Thursday, January 30, 2014

Emulsified Green Chili Salsa


Green Chili Salsa
Salsa Verde - An Emulsified Green Chili Salsa
This recipe came from my attempts to make a Salsa Verde that I found at Dos Coyotes Border Cafe their Green Chili Salsa is one of my favorites. While I still don't think I 'Nailed it' I do believe I've made some batches that were better! This recipe will give you a fresh, light, exotic green salsa with a hint of heat.  As with most of my recipes, I strive to give you the basic building blocks of the recipe, so that you can make it your own my changing it. This recipe will give you a fresh tasting, rather exotic salsa with just a hint of heat.

Green Chili Salsa

Salsa Verde Ingredients:

2 Poblano or Pasilla Peppers - these are large fat mild Chili Peppers
2 Jalapeno Peppers - these are  small smooth skinned hotter Chili Peppers
1/2 Large onion
1/2 cup Canola or other vegetable Oil
1 Bunch Cilantro leaves stripped from the stems

A Chili by any other name? There's lots of confusion concerning the names of Chilis: Poblano, Ancho, Pasilla. Here's a picture of the ones I use http://www.worldcrops.org/images/content/Poblano_peppers_in_S._Deerfield_-_550.JPG

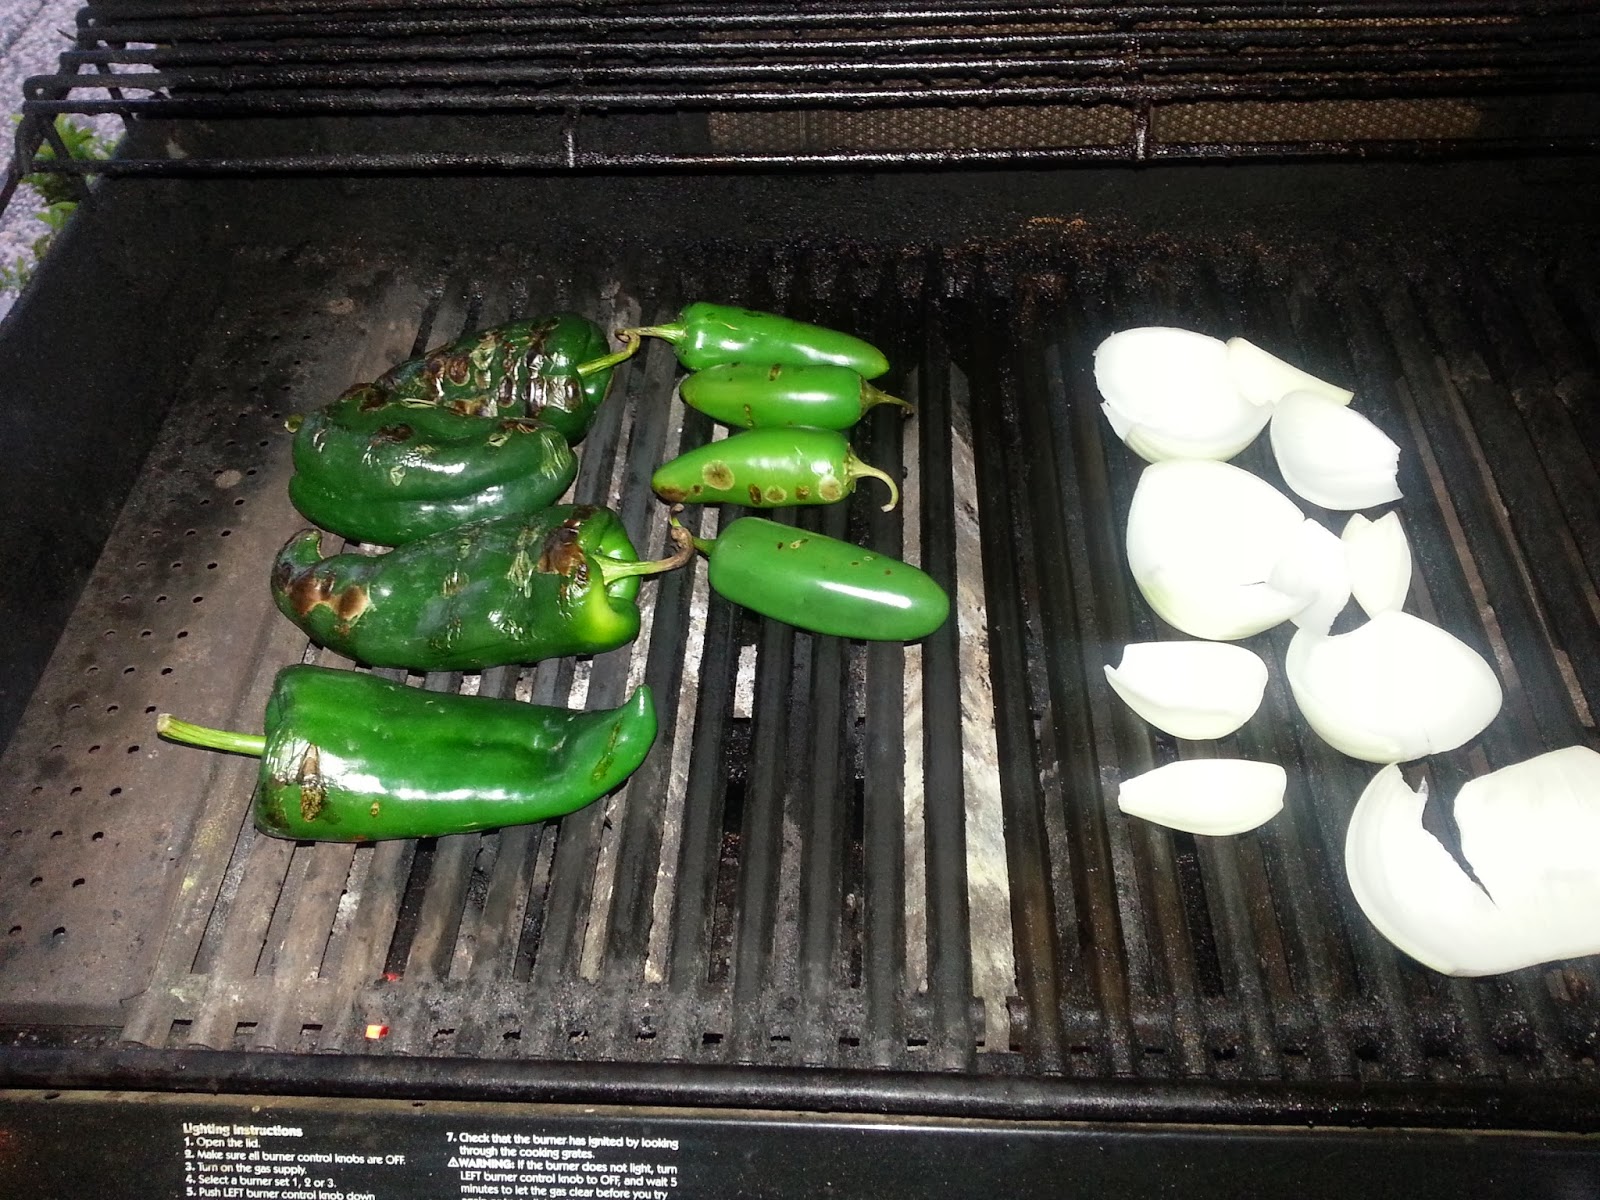
Roast the Peppers and onion, I like to separate the layers of the onion
Green Chili Salsa
Once the pepper's skins have been scorched - place them in a closed plastic container to steam and cool down. Once the peppers are cool enough to handle, remove the tops, skin and seeds.

Place the oil in the blender and either add each ingredient separately between bursts of blending, or turn on the blender and add the Onion, Peppers (I cut them into strips), and cilantro.

Serve it with traditional Tortilla Chips, Crackers, as a vegetable dip, and as a topping for your favorite Mexican dish.

For Taste Sake

Green Chili Salsa
It's the emulsification of the oil and the moisture in the peppers and onions that gives the salsa it's unique color

The oil does add to the flavor, so experiment with different oils.

Add Salt and pepper to taste

When adding salt to this recipe, remember to take into account the amount of salt that may already be present on the chips that you're serving it with - be sure to taste it with a chip and not just with your finger

Roasting the onion releases the gas that gives onions their 'bite', so if you like the bite of raw onion, don't roast the onion.

Roasted tomatillos add great flavor - cut them in half or quarters and roast them with the Chili Peppers and onion - you'll have to add extra jalapenos to keep the tomatillos from diluting the heat.

You can also throw a raw garlic clove or two in the blender with the other ingredients to step up the flavor.

Serve it with traditional Tortilla Chips, Crackers, as a vegetable dip, and as a topping for your favorite Mexican dish.

If you have a really good blender, you don't have to strip the cilantro leaves from the stems - the blender will pulverize the stems.

The Chili Peppers can be roasted on a BBQ grill, on a gas stove burner, gas or electric oven broiler, turn them often until the skin has been scorched and blistered


Monday, September 30, 2013

Mexican Pork Riblets

Mexican Pork Riblets


This is my all time favorite Pork dish. Tender fall of the bone pork, slow cooked in a flavorful Mexican sauce. This dish can be made with any cut of pork. I think it's best with riblets.
This can be served as a main dish or as an appetizer. If you choose to make it with boneless Pork, then this makes a wonderful taco or burrito filling.
There's a great deal of talk about peasant food - cheap, common food often raised to gourmet level. 'Riblets' are pork rib timings. When a rack of pork ribs are trimmed, especially when trimmed for Santa Fe style there's not much else that can be done with those trimmings, it's too much trouble to separate the meat from the bone, often the riblets are thrown away. Some places will sell them. Many people, myself included, think the flavor of the meat closest to the bone is better.

The Recipe is simple and the results are outstanding.
3 to 5 pounds or so pork cut into 1" cubes, riblets should be cut into pieces - cut between the bone
3 - 7.75 oz. Cans of El Pato Mexican Tomato Sauce
1 or 2 Tbsp ground Cumin spice
1 Medium to Large Onion sliced

Place the pork, onion, sauce and cumin in a Crock Pot, stir so that everything is coated in sauce. Cover and put on low for a minimum of 5 hours. When the meat can easily be pulled apart or pulled off the bone, they're done. You can turn the heat down to warm until it's time to eat.

I commonly will prepare everything in the removable crock, and put it in the refrigerator over night. In the morning, just before leaving for work, I'll put the crock in the holder and set it on low. Nine or so hours later, when I arrive home, the house smells delicious! It only takes a few minutes to prepare a side dish, and sit down to a delicious dinner.

If you're in a hurry - you can put everything into a large pot, add some broth (Chicken or Vegetable) or even water to thin out the sauce, turn the stove to medium high and stir ever 5 to 7 minutes until tender.

For Taste Sake
This can be served with the traditional refried beans and rice.
Another good alternative I enjoy them with is whole wheat angel hair pasta. This is one of the few dishes that is hearty enough to not get overpowered by the whole wheat pasta. Regular pasta is also a good side dish.

For children and those faint of heart you can control the heat by using only tomato sauce, or 2 cans tomato sauce to one El Pato, or 1 can tomato sauce to 2 El Pato. You can further increase the heat by adding chipotle peppers either finely minced or blended in.

You can also experiment with the amount of cumin you add to the dish, for those who really like the flavors of Mexican cuisine - you can easily add another tablespoon or two.

Just a note to be aware of the bones in this dish, when cooking for long periods of time the bones can begin to disintegrate, so chew carefully.


Tuesday, April 9, 2013

Thai Tilapia

Thai Tilapia - Like Thai Food but don't know how to make it at home? Do you like Tilapia but
you're tired of the same old recipes? Here's an easy to make, yet exotic tasting dish that you can make at home and wow your friends and family with!

Ingredients 
2 Large or 4 small Fillets of Tilapia (for 2 people - can be doubled with the same amount of ingredients - for more people add appropriate amount of listed ingredients)
1 Can of Coconut Milk
1 Green onion chopped
1 or 2 Tablespoons of Fish Sauce
4 large Basil leaves (Regular or Thai Basil)
2-3 Sliced Mushrooms
1 Schllot sliced (2-3 tablespoons of onion can be substituted
1 Jar Green Curry Paste

1 Cup Uncooked Rice

Start cooking the Rice First
Bring 1 1/2 Cup of water to a boil in a covered pot. Add 1 cup rice, stir, cover and lower the heat as low as it will go - just enough to keep it warm (it's best if you don't open the lid for 20 min or so.

In a large skillet (one with a cover is preferable but not necessary) pour the can of coconut milk in and start with a medium high heat. To keep from contaminating the curry paste, use 2 spoons, one to take the curry paste from the jar and tap it on the side of the skillet to drop the paste in the milk. Use the other spoon to stir the paste into the coconut milk. Add the Green Curry paste to taste - typically the Green Curry Paste is sweet but too much can still give you some heat! Keep adding paste and tasting the milk/curry mixture until it's to your liking. For reference I typically add around 3 teaspoons. Add the shallot, green onion, mushrooms, fish sauce, and sliced basil to the mixture, when it starts to simmer, turn the heat down to medium and add the fillets one at a time, making sure they get good contact with the mixture. As the fillets simmer, gently move them around in the pan to ensure they're all cooking evenly. When the fillets turn opaque/white all the way through - they're done! The rice should also be ready.

This dish can be served on a plate or in a bowl. Fish can be served beside or on top of the rice, spoon the vegetables and coconut milk mixture on the rice.

For Taste Sake
Basil is a delicate herb - it needs to be sliced or ripped just before you put it in the mixture, otherwise it will turn black while it waits to be put in the sauce.

Other fish can be substituted - Sawi, Basa, Perch, etc. thin white fish is best.

Peas, green beans or Broccoli make great side dishes.

This dish can also be prepared in the oven, in a Pyrex dish, 350 degrees.


Sunday, February 3, 2013

Fred's Famous Pasta/ Macaroni Salad

Fred's Famous Pasta/ Macaroni  Salad

This Pasta Salad also called Macaroni Salad is a family favorite. We like to eat it while out in the boat, or Wine Tasting. This easy to make salad, is top notch, full of flavor, yet easy to make and will keep in the refrigerator for several days.

You can cut the ingredients in half or make a double or triple batch according to your needs.

1 Lb. Small Pasta Shells
2 Cans Chunk Lite Tuna - drained
3 -4 Table Spoons Minced Shallot
Mayonnaise
2 Cups Frozen Peas
Salt for seasoning the water

Bring 4quarts of water to a boil and salt the water heavily (water should taste like the Ocean's salt water)
Pour the pasta shells into the boiling water, stir immediately, then ever so often. As the pasta gets close done, taste it, frequently. When it has reached firm but not hard 'Al dente'  - add the frozen peas. When the water begins to boil again, turn off the heat, remove the pot from the stove and drain the pasta and peas in a colander. Rinse the pasta and peas with cold water to stop the pasta's cooking.
Add the cooled and drained pasta and peas into a bowl or reuse the pot you just cooked them in. Add the two cans of tuna (fluff it with a fork), shallot, and mayonnaise. Mix thouroughly.

The pasta will continue to absorb the mayonnaise. Many times I'll make the salad, the night before. So I'll cover the bowl or pot and put it in the refrigerator for the night. Just before serving or putting into a container for travel, add more mayonnaise, possibly a little extra depending on how long before the salad will be consumed.

For Taste Sake
Some people like a little mustard in their pasta salad - a little dry, yellow, or brown 1 teaspoon to a tablespoon for a little extra flavor, or some horseradish for a bit of a kick.

A sliced hard boiled egg on top for presentation or chopped and mixed in can add additional richness and flavor.

Experiment with different pastas, screws, bow ties, medium shells etc.


Sunday, January 2, 2011

Better Than Garlic Bread


Better than Garlic Bread. There's just SOME meals I have to have a good bread with - such as seafood. I used to reach for Garlic Bread on those occasions - homemade or store bought it was all good...... UNTIL I discovered this way of preparing, serving bread. Almost any bread will do but for the best results, pick a rustic artisan bread, one with small holes works best, my favorite is Puglasese made at a grocery store that we frequent. Next you want the very best Extra Virgin Olive Oil that you can find, a specialty salt like Pink Salt or Grey Salt, and a pealed clove of garlic.


Cut the bread in half lengthwise.


Toast the bread thoroughly (either in an oven, toaster oven or on a BBQ grill) I think toasted on a BBQ grill with grill marks is the most impressive with a little added kick of smoky flavor but it does require some extra skill to keep from burning the bread.

As soon as the bread is well toasted, take the garlic clove an rub it all over the exposed toasted inside of the bread. The toasted bread acts as sandpaper and the garlic will rub off onto the bread. Take special note of your and your guest's taste for garlic - don't over do it.


Next use a Silicone Brush to spread the Extra Virgin Olive Oil generously over the exposed toasted inside of the bread.


Sprinkle a pinch of Pink Salt or Grey Saltover the bread, slice and serve.


For Taste Sake
Pink Salt and Grey Salt aren't as salty as table salt - they have a 'mineral' taste to them - enhancing the flavor.

When you slice the bread in half, lengthwise, pay close attention to the edges of the bread, especially if you're going to grill it. Often times the bottom half is well proportioned but the top half's edge may be quite thin and subject to burning - it's a good practice to trim the thin edges back before toasting.

A Silicone Brush is best at spreading the Extra Virgin Olive Oil over the bread - the silicone will not leave any bristles on your food, will withstand high cooking temperatures, and cleans easily because the bristles will not absorb food.