Showing posts with label Side Dish. Show all posts

Sunday, January 11, 2015

Teriyaki and Garlic Glazed Edamame

Teriyaki and Garlic Glazed Edamame!

Teriyaki and Garlic Glazed Edamame makes a great appetizer or finger food side dish.

This quick and easy recipe will have you and your guests licking their fingers, wanting more. 

Edamame are immature soybeans in the pod. Commonly found in Asian dishes. I've been in several
Teriyaki garlic glazed Edamame
Japanese Restaurants that serve a bowl of steamed edamame to munch on when you are seated. They're a healthy snack, and I commonly turn to them when I'm making finger food for dinner. It's much easier to put down your chicken leg and pick up an edamame pod, extract the beans, and go back to your chicken leg. My favorite recipe for them is with a Teriyaki and Garlic glaze. Edamame in the shell are often found in the frozen vegetable section of grocery stores. One pound should serve four people as a side dish or more people as an appetizer. The can be server warm or cold.

1 Pound Edamame in the shell
1/4 to 1/2 cup of  broth (Vegetable, Chicken, or Beef) or water
2-3 cloves of garlic minced
1/4 to 1/2 cup Teriyaki Sauce

In a large sauce pan over medium heat, put the edamame in the pan with the broth or water - this
Teriyaki garlic glazed Edamame in the pan
liquid is to simply help thaw the edamame, after a few minutes when it looks like the edamame is starting to thaw, add the Teriyaki sauce and garlic. Stir occasionally to cote the pods, when the broth or water has evaporated and the Teriyaki sauce starts to thicken and become sticky. They're done! Each Teriyaki sauce is different - besure you buy Teriyaki 'Sauce' and not marinade which is much thinner. As the liquid starts to evaporate, start turning down the heat so you can gauge the thickness of the sauce and prevent burning.
Serve hot or at room temperature. An Asian style bowl or small dish adds to the theme. They're eaten by grasping the pointy end of the pod, placing the entire pod in your mouth and pulling the pod back out of your mouth while gently clamping down on the pod enough to cause the pod to split and the beans to remain in your mouth.
Finger Food Dinner: Teriyaki garlic glazed Edamame, breaded pork medalions, grilled trout, crab quesadilla.
An empty bowl for discarding the pods is a handy addition.


Thursday, August 14, 2014

Easy Thai Curry Brussels Sprouts

Easy Thai Curry Brussels Sprouts

Are you looking for a way to create Thai food at home? Impress your friends, family, and visiting dignitaries - not to mention your taste buds, by preparing this simple yet tasty dis at home.

Easy Thai Curry Brussels Sprouts is simple and quick to prepare and the results are very
Easy Thai Curry Brussels Sprouts
impressive. Those that are familiar with Thai food will be impressed with your cooking skills and those that are not familiar with Thai food will find themselves liking it!

1 Can Coconut Milk
1 pound Brussels Sprouts (stem cut, cut in half length-wise, loose and discolored leaves discarded)
8 or so Mushrooms quartered
1/2 medium Onion sliced
Thai Curry Paste (Green, Yellow, or Red)

Into a deep skillet or pot, empty the can of coconut milk. Heat the coconut milk over a medium high heat. Dissolve teaspoons of Thai Curry Paste into the coconut milk until the curry mixture tastes slightly stronger than you typically prefer. I typically start with 2 to 3 teaspoons of Thai Curry Paste. Add the Brussels Sprouts, onion slices and mushrooms to the curry mixture. Bring the mixture to a slow boil, stir until the Brussels Sprouts reach the tenderness you prefer. Serve in a bowl.

For taste Sake
Typically Green Thai Curry is on the sweeter and milder side, Yellow Thai Curry is medium spicy and Red Thai Curry can be spicy hot. BUT since you are preparing this dish, you are in control. Extra Green paste can make the dish spicy, and holding back on the Red Curry Paste can give you milder results.    


Monday, July 7, 2014

BBQ Grilled Sweet Potatoes

BBQ Grilled Sweet Potatoes

Imagine a warm slice of sweet potato with appealing grill marks, a slight crust,
BBQ Grilled Sweet Potatoes
giving way to moist fluffy potato. The sweet taste of sweet potato with a slight tang of mustard on your tongue.

Impress your friends and family with this simple recipe that makes an excellent addition to any BBQ.

Take one or more Sweet Potatoes or Yams, pealed and then sliced 1/4" to 3/8" thick. Place the potato slices in a microwavable bowl, cover them with water then microwave them on high for approximately 10 min. Drain the water off and lay the slices out on a cutting board or any flat surface. I prepare a mixture of 1 part mustard and 1 part Cooking oil. If you don't like mustard you can use straight cooking oil. The mustard does add a bit of tang to the potatoes. Remember that mustard typically has vinegar in it and vinegar and oil don't mix well so you do need to use a wisk or fork and give the mixture a good whippin'! Brush one side of the potato, place it oiled side down on a preheated grill over a medium heat. Then brush the other side of the potato with your oil mixture.

The goal of microwaving the potato slices are to partially cook the potato - not completely cook it through. A thoroughly cooked potato is going to need some extra care on the grill - you'll probably need a spatula to turn them. Partially cooked potatoes should be able to be handled with tongs. The oil mix will keep the potatoes from sticking to the grill. With some practice, you can achieve perfect grill marks. The combination of heat and oil coating will give the potato slices a slight crust and they'll be soft and moist inside.
My local Farmer's Market carries Japanese Sweet Potatoes which can grow relatively large when
Japanese Sweet Potato
compared to most sweet potatoes and yams. Cutting a smaller sweet potato diagonally or length-wise will give you larger slices which are easier to handle. You can also use regular potatoes in this recipe, the waxier type (red, yellow Yukon etc.) work best.


Wednesday, August 21, 2013

Summer Pasta Vegetable Salad

Summer Pasta Vegetable Salad - a tasty mix of Pasta and vegetables dressed in a wonderful herb vinaigrette dressing. I love 'lightening up' a pasta salad with vegetables and combining this with my favorite herb dressing.

 1 lb Pasta (screws, bow tie, shells etc.) cooked in salted water
1 Cup Broccoli tops cut into small pieces
1 Cup Cucumber, peeled, seeds removed, cut into chunks
1 Cup Mushroom sliced
1 Cup Carrot Shredded
1 Can Garbanzo Beans, drained
1/2 cup Onion rough chopped
1/2 Cup Sliced Radishes

Bring a pot of salted water to a boil, add the pasta to the water until cooked. Drain the pasta and run cold water over it to stop the cooking process. While the pasta is cooking, make good use of your time by cutting up the vegetables.
Mix the cold pasta and vegetables, I like to put about 1/4 cup dressing on the salad to keep the pasta from sticking together, then add the remainder of the dressing to the salad just before serving and toss.

Dressing
This dressing is equally at home on a green salad as it is on a pasta salad. It can be quickly made and used immediately, but comes to full flavor if left to sit overnight. It can also be used as a marinade for Chicken, Beef, Pork, and Sea Food.

3/4 Cup Vegetable Oil
1/4 Cup Apple Cider Vinegar
1 tsp dried Sweet Basil
1 tsp dried Dill Weed
1 tsp water
1 tsp Soy Sauce
1 Tbsp Honey
1/2 tsp ground Cayenne Pepper
1 large or 4 small cloves of Garlic, pressed
Combine all ingredients, shake well before using.

For Taste Sake
 The Onions can be Red, Green, Shallot
Additional items to add:
   Olives (Green or Black)
   Tomatoes Grape, sweet 100's or sliced
   Beans Kidney, Cannellini, Butter
   Sweet Bell Peppers


Sunday, February 3, 2013

Fred's Famous Pasta/ Macaroni Salad

Fred's Famous Pasta/ Macaroni  Salad

This Pasta Salad also called Macaroni Salad is a family favorite. We like to eat it while out in the boat, or Wine Tasting. This easy to make salad, is top notch, full of flavor, yet easy to make and will keep in the refrigerator for several days.

You can cut the ingredients in half or make a double or triple batch according to your needs.

1 Lb. Small Pasta Shells
2 Cans Chunk Lite Tuna - drained
3 -4 Table Spoons Minced Shallot
Mayonnaise
2 Cups Frozen Peas
Salt for seasoning the water

Bring 4quarts of water to a boil and salt the water heavily (water should taste like the Ocean's salt water)
Pour the pasta shells into the boiling water, stir immediately, then ever so often. As the pasta gets close done, taste it, frequently. When it has reached firm but not hard 'Al dente'  - add the frozen peas. When the water begins to boil again, turn off the heat, remove the pot from the stove and drain the pasta and peas in a colander. Rinse the pasta and peas with cold water to stop the pasta's cooking.
Add the cooled and drained pasta and peas into a bowl or reuse the pot you just cooked them in. Add the two cans of tuna (fluff it with a fork), shallot, and mayonnaise. Mix thouroughly.

The pasta will continue to absorb the mayonnaise. Many times I'll make the salad, the night before. So I'll cover the bowl or pot and put it in the refrigerator for the night. Just before serving or putting into a container for travel, add more mayonnaise, possibly a little extra depending on how long before the salad will be consumed.

For Taste Sake
Some people like a little mustard in their pasta salad - a little dry, yellow, or brown 1 teaspoon to a tablespoon for a little extra flavor, or some horseradish for a bit of a kick.

A sliced hard boiled egg on top for presentation or chopped and mixed in can add additional richness and flavor.

Experiment with different pastas, screws, bow ties, medium shells etc.


Sunday, May 27, 2012

Tabouli, Tabbouleh, Tabbouleh

Tabouli, Tabbouleh, Tabbouleh 

No matter how you spell it - it's one of my favorite summer salads.
Summer is the ideal time to make this salad with fresh ingredients, the Tomato, Cucumber, Onion, herbs, lemon juice and Olive Oil, mixed together just taste like summer freshness on your tongue! There are 'Boxed' versions of this salad but like many 'Boxed' versions of things it bears little resemblance to the Fresh version. It's my favorite side dish to BBQ or grilled chicken but goes with just about anything. This Middle Eastern salad is often referred to as 'Parsley Salad' - my version has the amount of parsley cut back and I've found many people prefer it to the heavy parsley version. Feel free to experiment to develop your own version.

2 Cups Wheat Bulgur (Cracked Wheat)
1 to 2 Cups Flat Leaf/Italian Parsley leaves - finely chopped Traditional versions add as much as 3 cups.
1/4 Cup Mint leaves finely chopped
3 Scallions or 1 large shallot minced
2 med - lg tomatoes cut into 1/2" cubes
1 lg Cucumber pealed, seeded, cut into 1/2" chunks
1/4 to 1/2 tsp fresh cracked black pepper
2 tsp salt
4 TBSP your best Extra Virgin Olive Oil (lesser oil can be substituted)
3-4 TBSP Lemon Juice

Place the 2 cups of Wheat Bulgur in a bowl and add 2 cups hot water and let stand 30 min. (this can be done a day or two ahead of time)

Add Soaked Bulgur and remaining ingredients to a bowl and mix well.

For Taste Sake

One of my favorite additions to this traditional dish is a can of garbanzo beans, drained & rinsed - many brands of canned Garbanzo Beans have salt added so you may want to taste your salad first before adding the additional salt. Grabanzo beans add texture and makes it a little more of a heavier substantial salad and will make it stretch a little further.

Another popular addition to Tabbouleh is chopped lettuce - lettuce adds another level of texture, makes your salad a bit lighter and fluffier and again can make it stretch a but further among your guests without having to make two batches.

Feta cheese is another good addition - remember to take into account that most feta cheese has salt in it.


You can substitute cherry tomatoes for whole ones, keep in mind cherry tomatoes are typically less acidic and therefore sweeter than most varieties of larger tomatoes. I prefer the whole tomatoes, cubed, but the cherry tomatoes run a close second.

Thursday, January 27, 2011

Steamed Italian Lima Beans and Peas

This is a simple yet tasty recipe that can be made in 5 minutes. A great side dish for incorporating a variety of vegetables into your diet. This recipe is very flexible, increasing it's size would only increase the cooking time slightly, change the proportions (ex. 60% peas/ 40% Lima Beans) vary the onion (Green Onion, Shallots, Leaks).

1 cup frozen Baby Lima Beans
1 cup frozen Peas
Extra Virgin Olive Oil
Dried Italian Herb mix
1/2 Medium Onion rough chopped, separate the layers
Salt & Pepper

Place your steamer basket in a medium pot and add water to just below the basket bottom. place Peas, Lima Beans and onion in the basket, cover and boil for approximately 5 minutes. Onion should be translucent, taste a Lima Bean to make sure it's warm enough to eat. Once vegetables are done, remove basket and place vegetables in a bowl. Drizzle Extra Virgin Olive Oil over the vegetables, add  salt, pepper and dried Italian Herbs to taste, mix well and serve.


Sunday, January 9, 2011

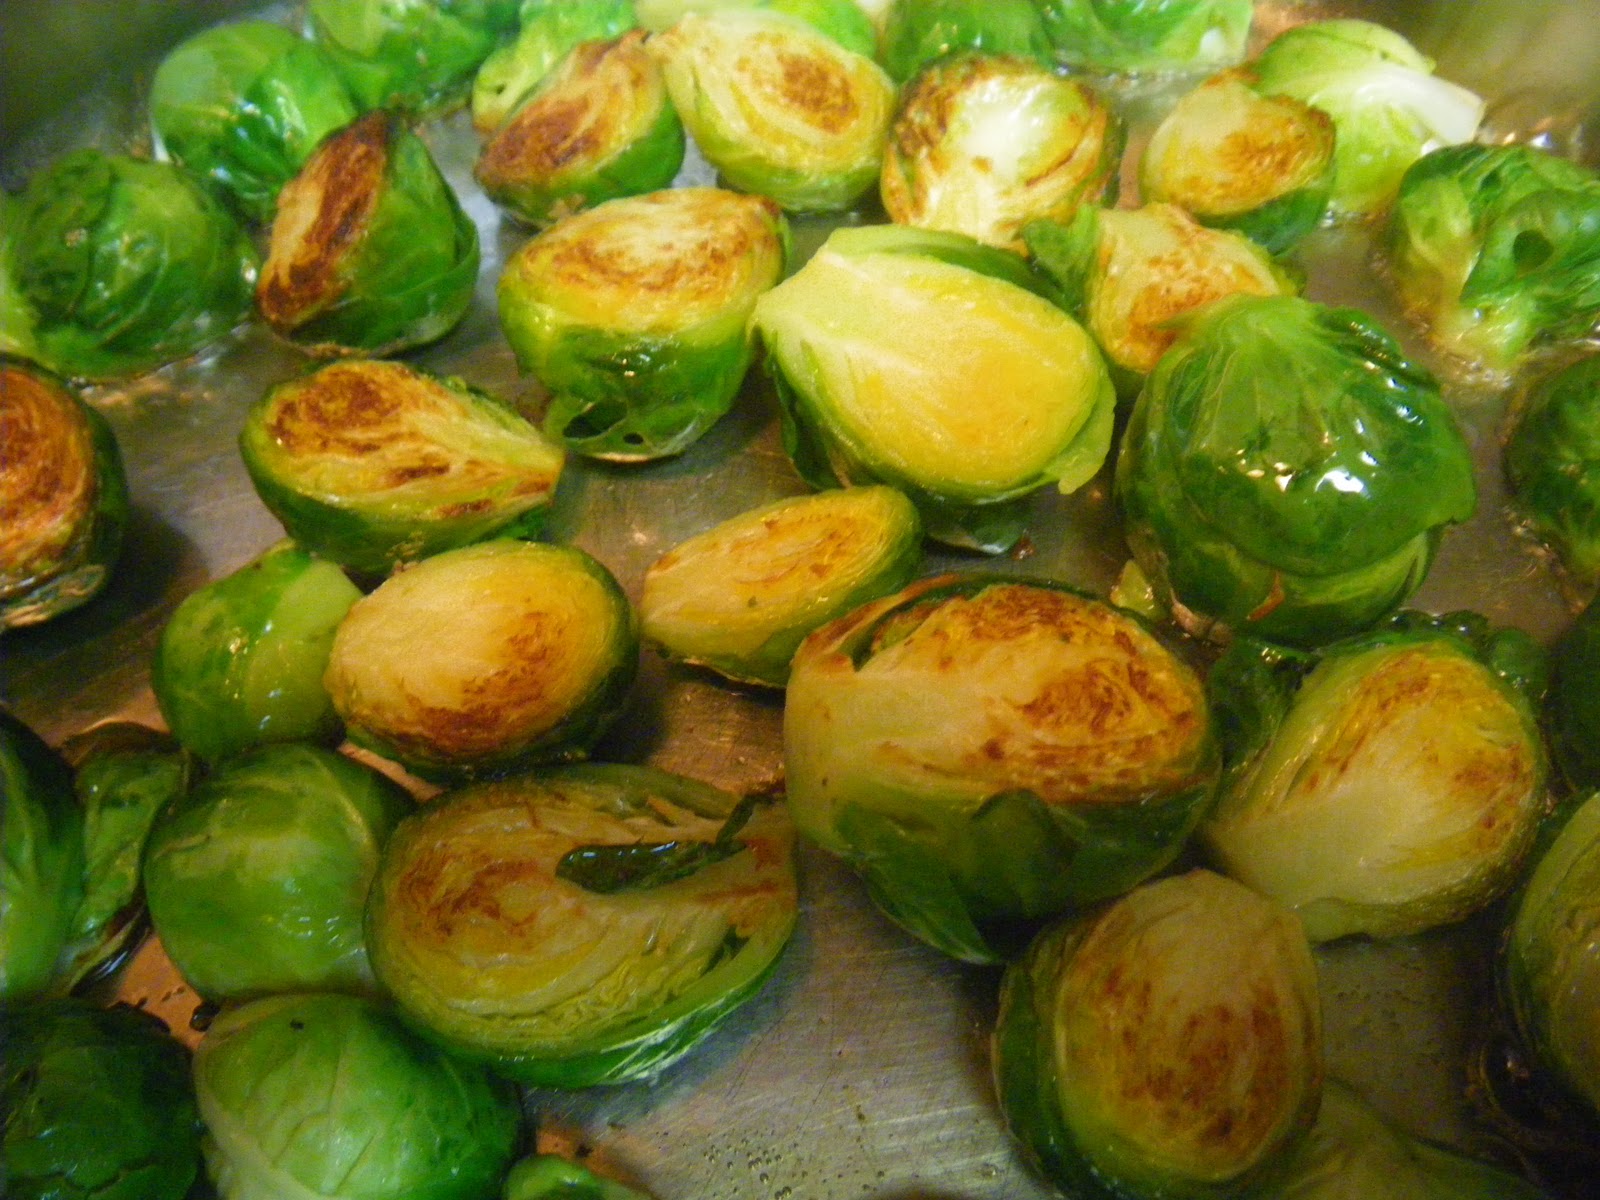
Brussel Sprouts

Brussel Sprouts - the mere mention of which can send people screaming off into the night!
I believe this stems from a bad childhood experience. When I was a child I was told

they were baby cabbages. Now what kid wouldn't enjoy eating kid sized cabbages?
If you're not a fan of Brussel Sprouts - approach this recipe with an open mind - it took me three years before I could convince my wife to let me bring them into the house and now this recipe is one of her favorite vegetable recipes! If you like Brussel Sprouts, here's a twist on most traditional methods of preparing them.

Fresh Brussel Sprouts - depending on size about 6 per person
1 Medium Shallot, pealed & minced
1/2 Carrot pealed and shredded
2-3 Tablespoons or more of Chopped Italian (flat leaf) Parsley
1/4 - 1/2 cup of chicken Broth
Butter & Olive Oil to generously cover the bottom of the pan.
Salt & pepper to taste - typically you don't need additional seasoning.


Start by 'cleaning the brussel sprouts - cut the stem end a bit shorter and remove the loose leaves, resulting from the cut and removing any discolored leaves.
Cut the brussel sprout in half lengthwise through the stem - aim for cutting one of the attached leaves in half through it's stem, accuracy isn't important but it helps keep the leaves intact through the cooking process,

In a large shallow fry pan, have enough Olive Oil & Butter (50/50 mix) to generously coat the bottom of the pan, medium-high heat. Once the Oil and Butter mixture is hot, place the 1/2 sprouts cut side down in the pan. A good method is to place them in a circle starting at the outer edge of the pan and work your way towards the center. This helps you keep track of how long the halves have been in the pan. When the sprout's cut side becomes browned, flip them over. They should brown in the approximate order that you placed them in the pan.

When all of the halves have been flipped over, add the rest of the ingredients (Parsley, Shallot, Carrot, and Chicken Broth) place the lid on the pan and let them cook until tender.
Enjoy!

For Taste Sake
A julienne peeler is a handy tool to shred the carrot, if you don't have one, you can use a conventional vegetable peeler. Use the peeler to produce long thin strips. Lay the strips on top of each other, cut the strips in half lengthwise then cut those halves lengthwise into as many strips as you can.

Chicken Broth can be replaced with a Chicken Bouillon and water mixture.

If you're not familiar with shallot, it's in the onion family, they are a small member of the onion family with a nutty flavor. Shallots are a bit more expensive than an onion. Onion can be substituted but the flavor will be a bit different.

I've tried to keep this recipe healthy. My brother in-law takes my recipe and puts a cube of butter in - how could you go wrong?


Monday, December 13, 2010

Homemade Raviolis

One of the best things about Homemade Raviolis is that you have complete control over how they’re made. There are three components to consider when making raviolis; filling, dough, and sauce.

The filling is limited only by your imagination. Meat, seafood, vegetables, mushrooms, and cheese is just a start.

Meat Raviolis fried in Olive Oil, with herbs and shallot
The pasta dough is very important. It has to stretch over the filling, stick to itself and hold up to a great amount of handling. After years of struggling with various recipes, I finally found one by Tyler Florence on the Food Network. My early batches of raviolis were made completely by hand, now I try to automate the process as much as possible. Currently I use a pasta roller attachment for my Kitchenaid. The Ravioli maker, is a cast aluminum rack of 12 holes surrounded by zigzag  borders, with a corresponding piece of plastic with 12 dimples that stretches the dough enough to make pockets to put the filling in.
The Kitchenaid pasta roller attachment will make a long sheet of pasta that fits over the ravioli maker's rack, The plastic tray fits over the rack, making dimples in the dough, fill the 12 dimples, then cover the rack with another sheet of pasta, run a rolling pin over the assembly. The pressure from the rolling pin, pinches the dough together , cutting it on the zigzag borders, making 12 raviolis.
  All of the automated equipment isn’t necessary , dough can be made by hand, and rolled out with a rolling pin or hand cranked pasta machine, dollops of filling can be laid out on a sheet of pasta on the counter, the second sheet can be laid on top of the other and the dull side of a butter knife can be used to press and cut the dough.

When rolling out the dough, keep in mind that the dough is doubled over, so to keep from minimizing the taste of your filling, keep the dough as thin as possible.

Whatever filling you decide to make, take into consideration that the filling is surrounded by dough, so often times it pays to over season the filling, especially meat filling that’s also going to be served in a bold sauce.

Sauce can be homemade, store bought, or fixed up store bought. Red sauce is traditional, but for variety consider, a pesto sauce or in the case of sea food ravioli, try an alfredo, white wine or cheese sauce . One of my favorite ways to enjoy homemade raviolis is with no sauce at all. In a large pot of lightly salted boiling water drop frozen raviolis, most will sink, when they start to float they are getting close to done. In a large fry pan, sauté some shallot, maybe some mushrooms in a healthy dose (more than you’d typically use) of Extra Virgin Olive Oil. Off to the side have some chopped herbs (Italian Parsley, Oregono, Rosemary, sage Garlic) Once the raviolis are close to done and the shallots are translucent, drain the raviolis and put them into the sauté. As the raviolis start to crisp up, put your fresh herb mix in the pan and finish cooking to the desired brown, crispness. Serve with shredded parmesan cheese.

Dough Recipe:
http://www.foodnetwork.com/recipes/tyler-florence/pasta-dough-for-ravioli-recipe2

Raviolis keep very well frozen – care must be taken that they don’t break!
I have this odd piece of Tupperware the top and bottom are the same depth, it’s wide and shallow enough to hold 20 raviolis in a 4 x 5 grid, I use the thin plastic sheets used as semi-disposable cutting boards, that I cut to fit inside the container. I put 20 raviolis down, a sheet of plastic on top of them, another 20 and another plastic sheet – I can fit 140 Raviolis (12 dozen less 4) in the container and freeze them. A handy way is to lay the raviolis out on a cookie sheet, freeze them individually (if they stick to the cookie sheet, just gently drop the cookie sheet from a inch or two above the counter)  then store them in a resealable bag or plastic ware. 

Meat Filling
Meat Raviolis fried in Olive Oil, with herbs & shallot, Parmesan
1 ½ lbs Ground beef
4 table spoons minced Italian Parsley
2 table spoons minced Rosemary
2 table spoons minced Oregono
2 table spoons minced Sage
2 table spoons chopped garlic
½ to 1 cup red wine
¼ cup Worchester sauce
Salt & pepper to taste
Brown the meat in a large skillet (do not pour off the grease), add the remaining ingredients. Continue to cook the meat until the liquid disappears, continue to stir the meat mixture until it becomes dry and starts to brown. To make the ground meat easier to work with I run it through a food processor chopping it finely.

Friday, November 19, 2010

Garlic Mashed Potatoes

Garlic Mashed Potatoes are one of my specialties – it’s an often requested side dish that I bring to family dinners.
Some people like mashed potatoes that have chunks of potato in them, or those made with the skins.When I want traditional garlic flavored mashed potatoes. I want mashed potatoes that are fluffy, creamy, buttery, garlicky, and well seasoned with salt. I want the type of mashed potatoes that can be eaten without gravy. The gravy is just a nice addition.

I’ve made as much as 20 pounds for a big Thanksgiving dinner. Let’s start with Five pounds, a good sized start for a family dinner. Adjust the recipe as your needs dictate.

5 Pounds of Russet or Idaho Potatoes - flaky baking style potato (not waxy potatoes like Red, or Yukon Gold etc.)
2-3 Tablespoons Salt
1 Cup Cream, or Milk, or Chicken Broth (your preference)
1 Stick Butter


Make the Garlic Paste First
As a rule of thumb start with one head of garlic per pound of potatoes, this will be more than necessary, but you’ll be adding it to taste so any overage can be used in another dish.

The garlic paste can be prepared ahead of time -mashed garlic can be kept in the refrigerator for more than a week.
Peel the garlic. For large amounts, I use a Garlic Peeler. There are several types out there, I use a silicone tube style Garlic Peeler. The clove goes in one side, pressure from your hand rolling it on the counter, cracks the dry skin and either removes it completely or makes it easy to remove. Get a system going, break the heads into cloves, put the cloves in one spot on the counter, the peeler in the middle and finished cloves on the other side. Tiny cloves aren’t worth keeping and peeling, toss them. Once the cloves are peeled, cut the little stem end off. These little particles can ruin the look of your mashed potatoes. Again get an assembly line going, one side of the cutting board have untrimmed cloves, and finished cloves placed on the other side.

Pre-Peeled garlic can be purchased – one head of garlic has an average of 15 good sized cloves – purchase accordingly.
Once the cloves have been peeled and trimmed. Roast them by placing them in a large frying pan that has a lid. Put enough vegetable oil the pan to lightly coat all the cloves. Stir or toss, to completely coat the cloves with oil. On a low heat, roast the garlic stirring or tossing regularly, until it becomes translucent. Raw garlic can be very strong, the longer the garlic is cooked the mellower and sweeter it becomes. Cooked down correctly, the garlic can become so mellow that it can be eaten straight. A bowl of mashed garlic is not out of the question. I’m assuming you wouldn’t be reading this recipe if you didn’t like the flavor of garlic. By roasting the garlic in the pan we’re trying to achieve a balance between the harsh raw and the mellow flavor that would be lost in the mashed potatoes. Once the cloves have become translucent, turn off the heat and mash the garlic with a fork or a flat hand operated potato masher. I’ve put the garlic in a blender or food processor but they mash it up so fine that the garlic flavor gets lost in the potatoes. Mashing the garlic by hand leaves some of the plant fibers intact, leaving small flavorful chunks of garlic in the potatoes and yields a much more flavorful result. 

Making the Potatoes
Peel the potatoes and remove any eyes. If the potatoes are large, cut them into evenly sized chunks. Similar sized chunks will ensure that they cook evenly. Making them smaller will allow them to cook quicker.

In a pot large enough to hold the potatoes and water, put in the potatoes, and cover them with cold water. Make sure there’s enough space between the water level and the top edge of the pot to allow for the water to boil. I like my water salted. I believe the flavor is far better when the potatoes absorb the salt as they are being cooked, than trying to add salt after they’re cooked. I sprinkle enough salt that would lightly and completely cover the bottom of the pot, approximately 2-3 tablespoons.
Bring the potatoes to a boil then turn the heat down to just enough to maintain a good boil. Boil the potatoes until fork tender – a fork should be able to sink ½ way into the potato with equal amount of effort (no hard center). Removing a larger chunk to a cutting board, cutting it in half and sampling the center is another way to check for doneness. When the potatoes are fully cooked, turn off the heat, and pour the potatoes into a colander in the sink to drain.
Put the butter and cream in the bottom of the pot you just used for cooking. Using a mixer to whip the potatoes, gradually put  the potatoes back in the pot adding more as the ones in the pot become whipped.. If a large batch of potatoes is being made, it can be helpful to work in batches, then mixing the batches together at the end. Be thorough with the whipping process – especially if you don’t like lumps. Uncooked potatoes and not spending enough time mixing are the two leading causes of lumpy mashed potatoes. Near the end of the whipping process, add the garlic paste, one heaping tablespoon at a time, integrating it thoroughly, stopping to taste test it every one or two tablespoons. When the flavor is to your liking, serve.

For Taste Sake
Avoid garlic that has sprouted - the sprouts can be bitter and will leave little green flecks in your otherwise white mashed potatoes.
If any of your cloves become scorched or overcooked in the roasting process - remove them - they'll be bitter.